Getting To Know Tive’s New Shipment Workflow
July 27, 2017
February 5, 2024
x min read

Many supply chain managers spend their days tracking down shipment schedules, interfacing with logistics partners, and monitoring shipments one at a time. The last thing a busy supply chain manager needs is more complexity. That’s why we’ve developed our new shipments workflow to provide all the benefits of real-time tracking while integrating seamlessly with existing supply chain management processes, enabling managers to plan, track, and analyze shipments all in one place.
Tive’s new shipment-oriented platform introduces shipment scheduling with custom information fields, reusable shipment profiles for faster configuration, full visibility of in-progress shipments, and access to historical shipment records. Here’s how it works:
Step 1: Schedule An Upcoming Shipment
Link to your existing shipment numbers
When a new shipment request comes in, you can schedule it right in the Tive platform using your existing naming conventions and custom ID fields. The tracker will be connected to your shipment name and number, so you can easily look up your shipment and access all the associated tracker data at any time.
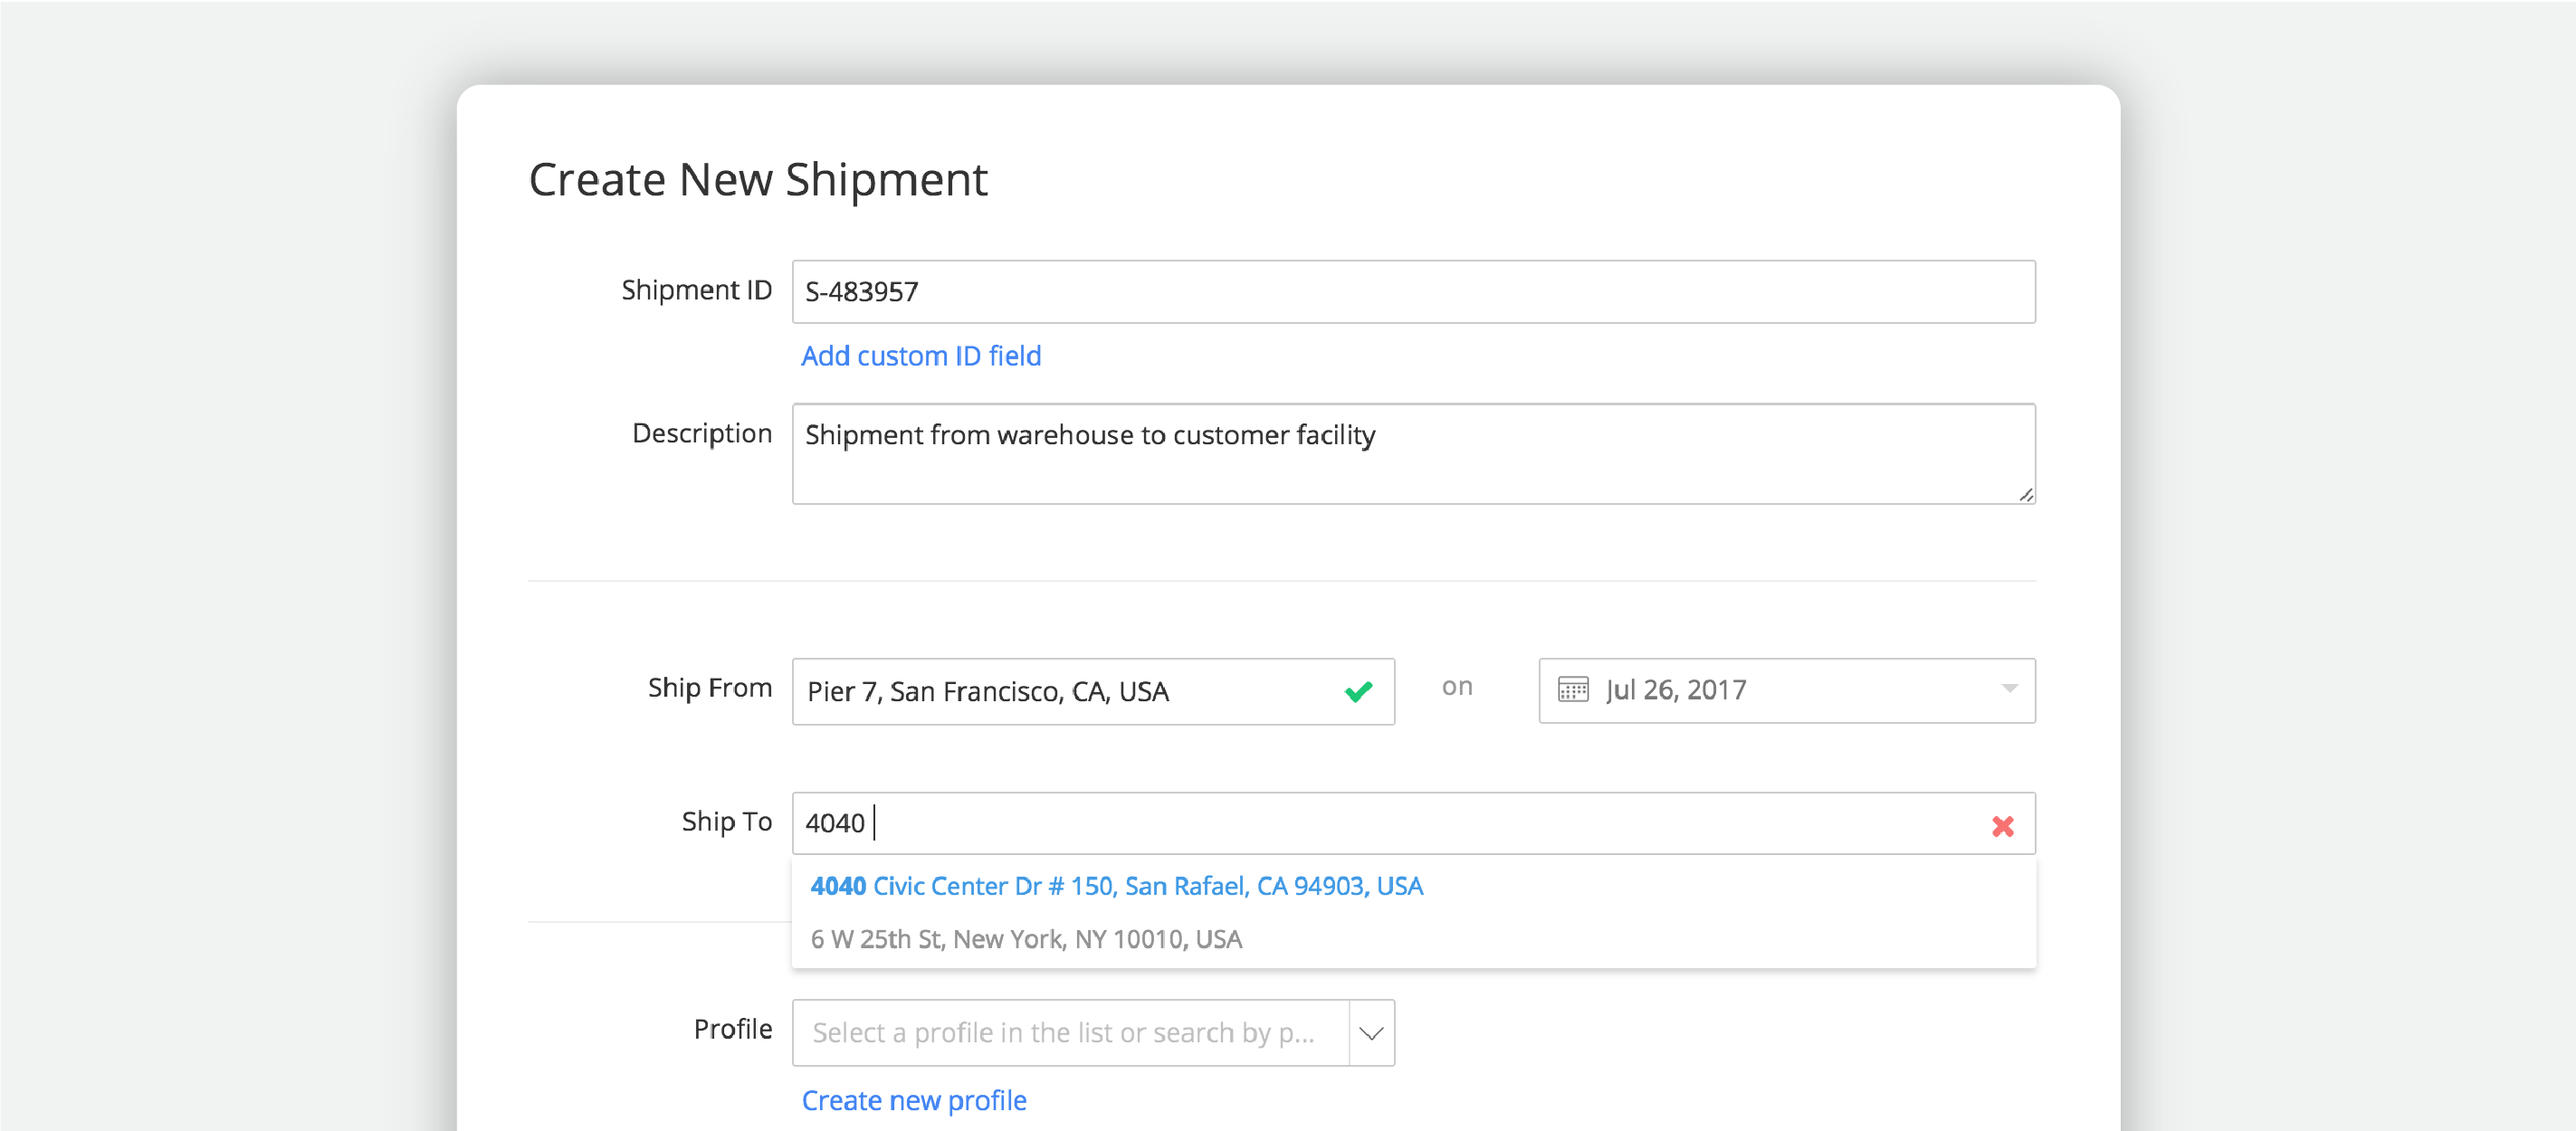
Enter shipment information in advance
The Create New Shipments workflow allows you to set up all of your shipment information in advance, including location, scheduled ship date and shipment destination. Interested users can then receive notifications when a shipment departs the shipping facility and when it arrives at its destination.
Create a reusable shipment profile
During the shipment creation process you can apply a pre-set profile when you create a new shipment. A shipment profile is a shortcut that applies a set of configurations to the trip, such as what alerts you want to receive or how often you want the tracker to transmit data. You can then reuse the profile anytime you have a similar shipment, saving you time and ensuring consistency across shipments.
Step 2: Deploy The Shipment
Click, scan, attach
Once you’re ready to ship, you’ll need to link a tracker to the shipment. This can be done right on the loading dock: the worker simply selects the scheduled shipment from a list and enters (or scans) the tracker barcode. Then the worker physically attaches the tracker to the shipment and off it goes.
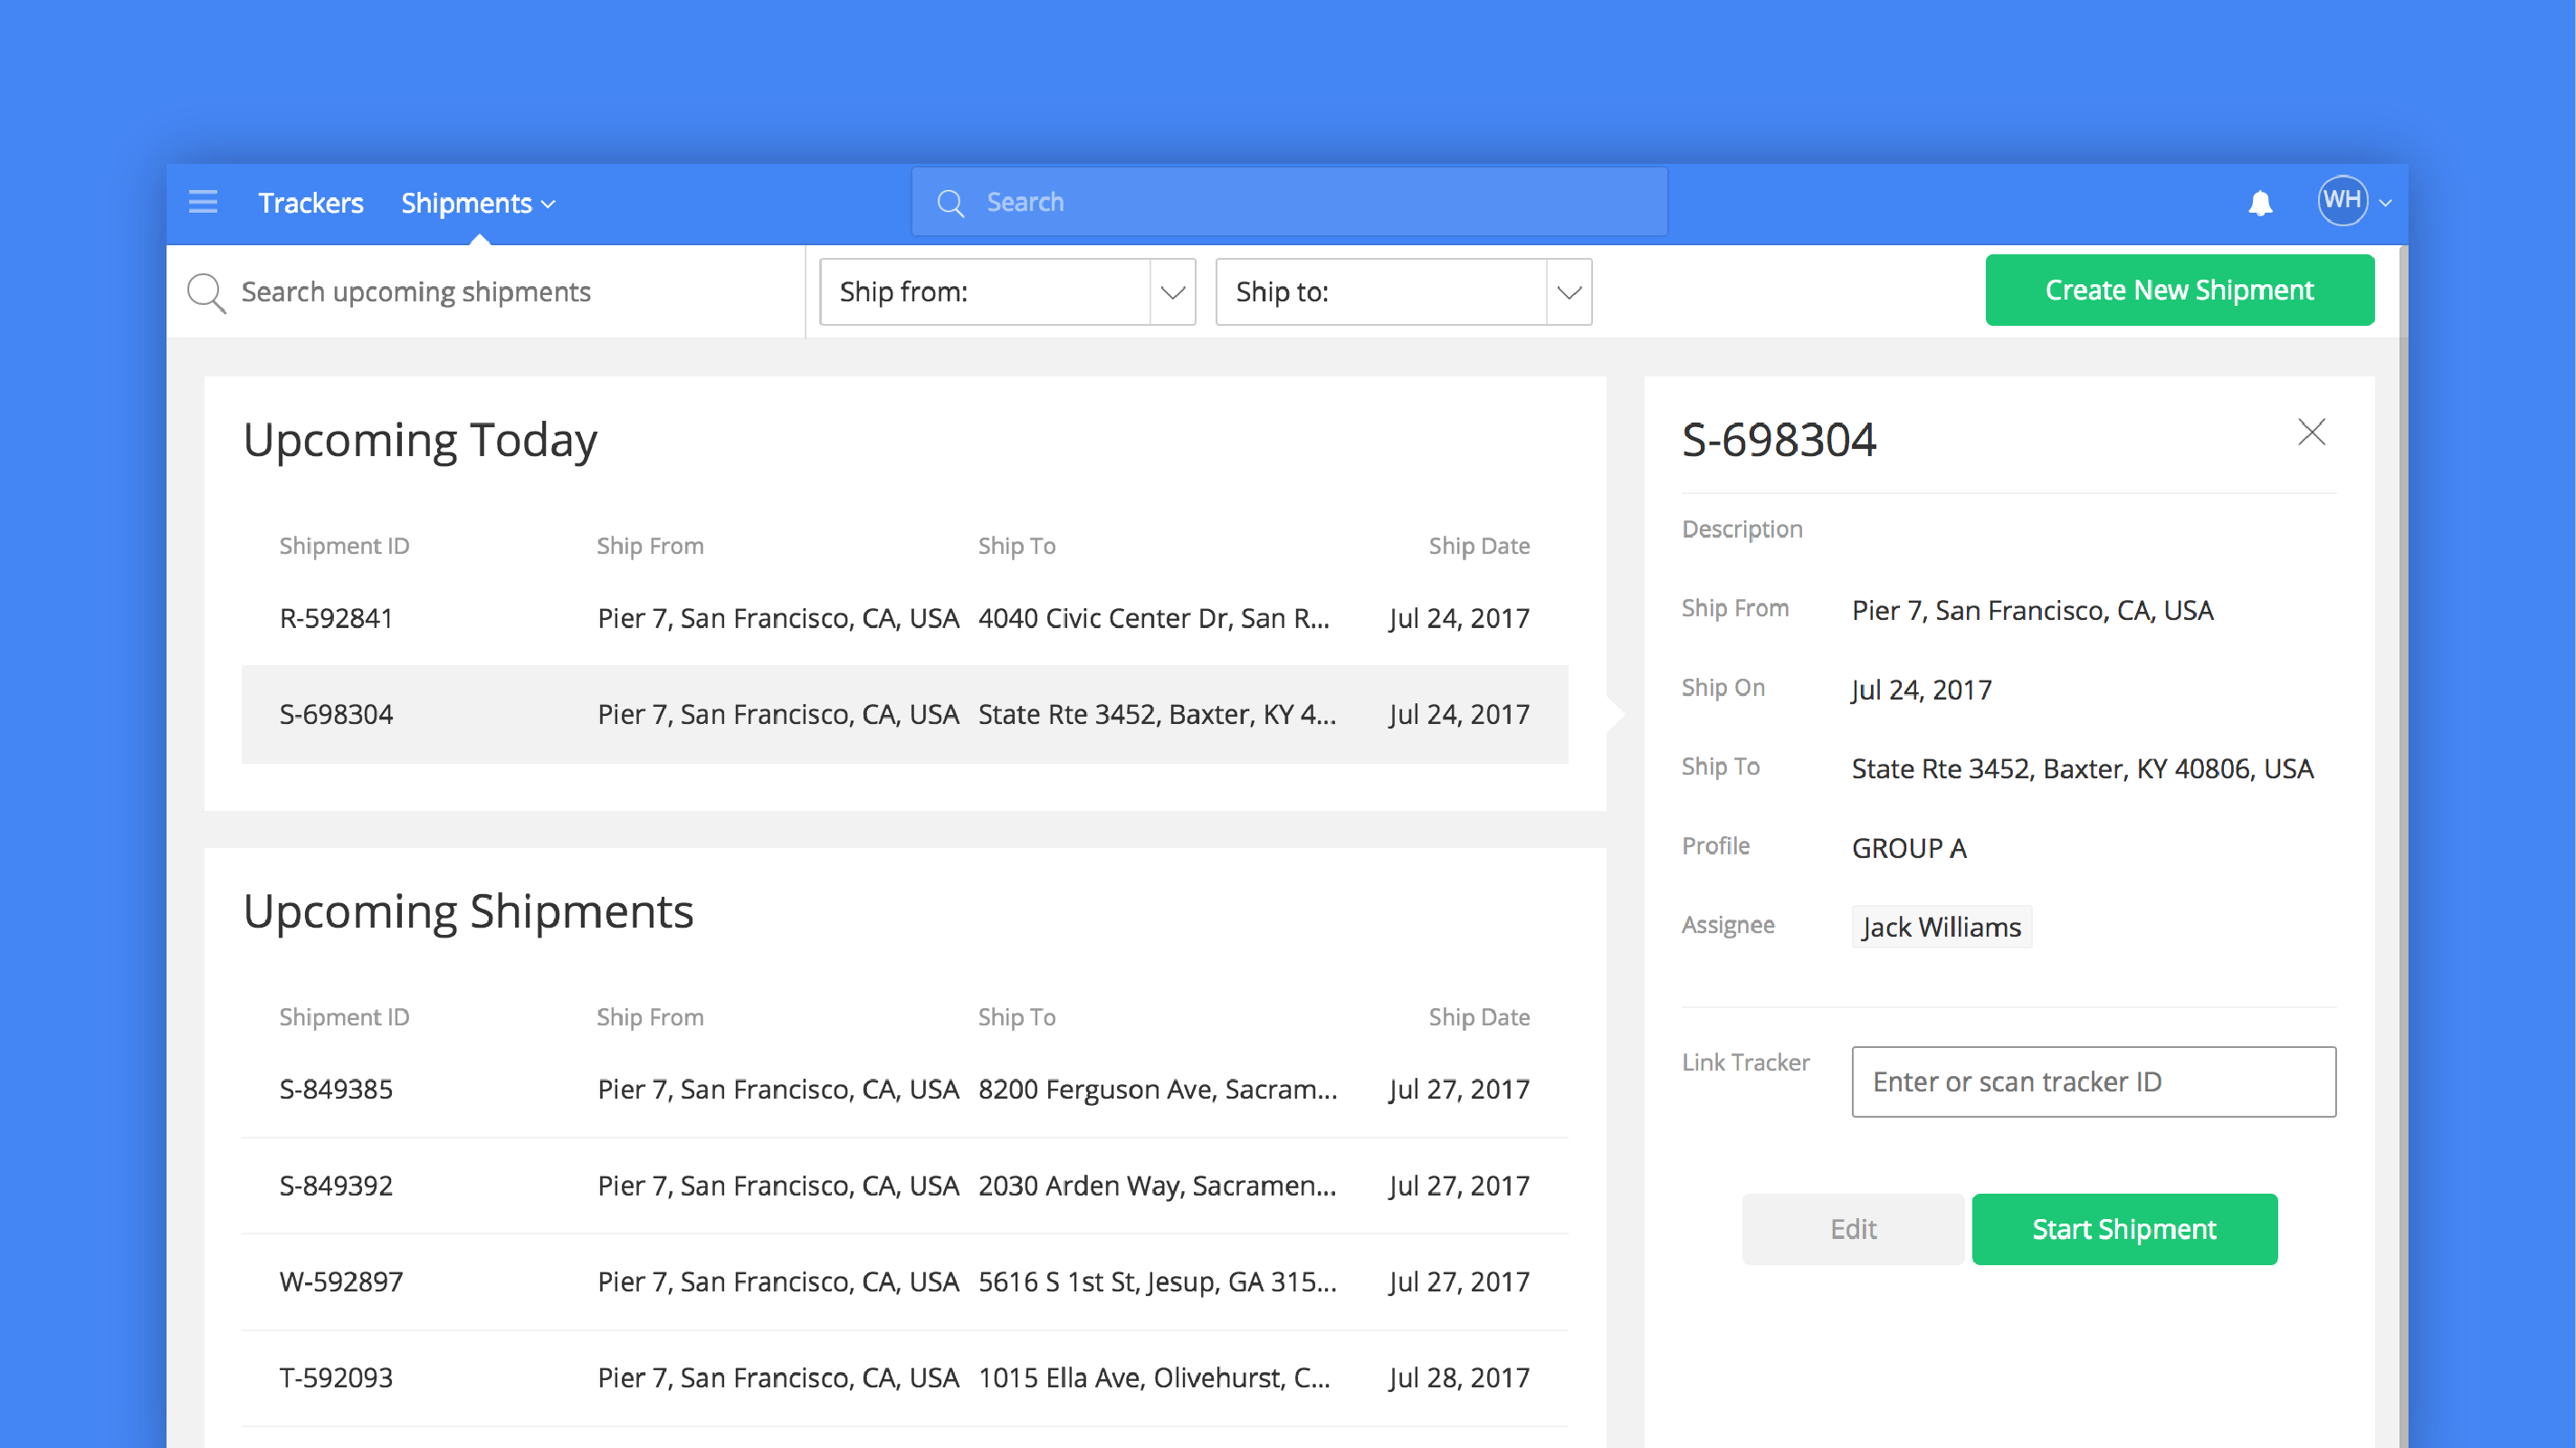
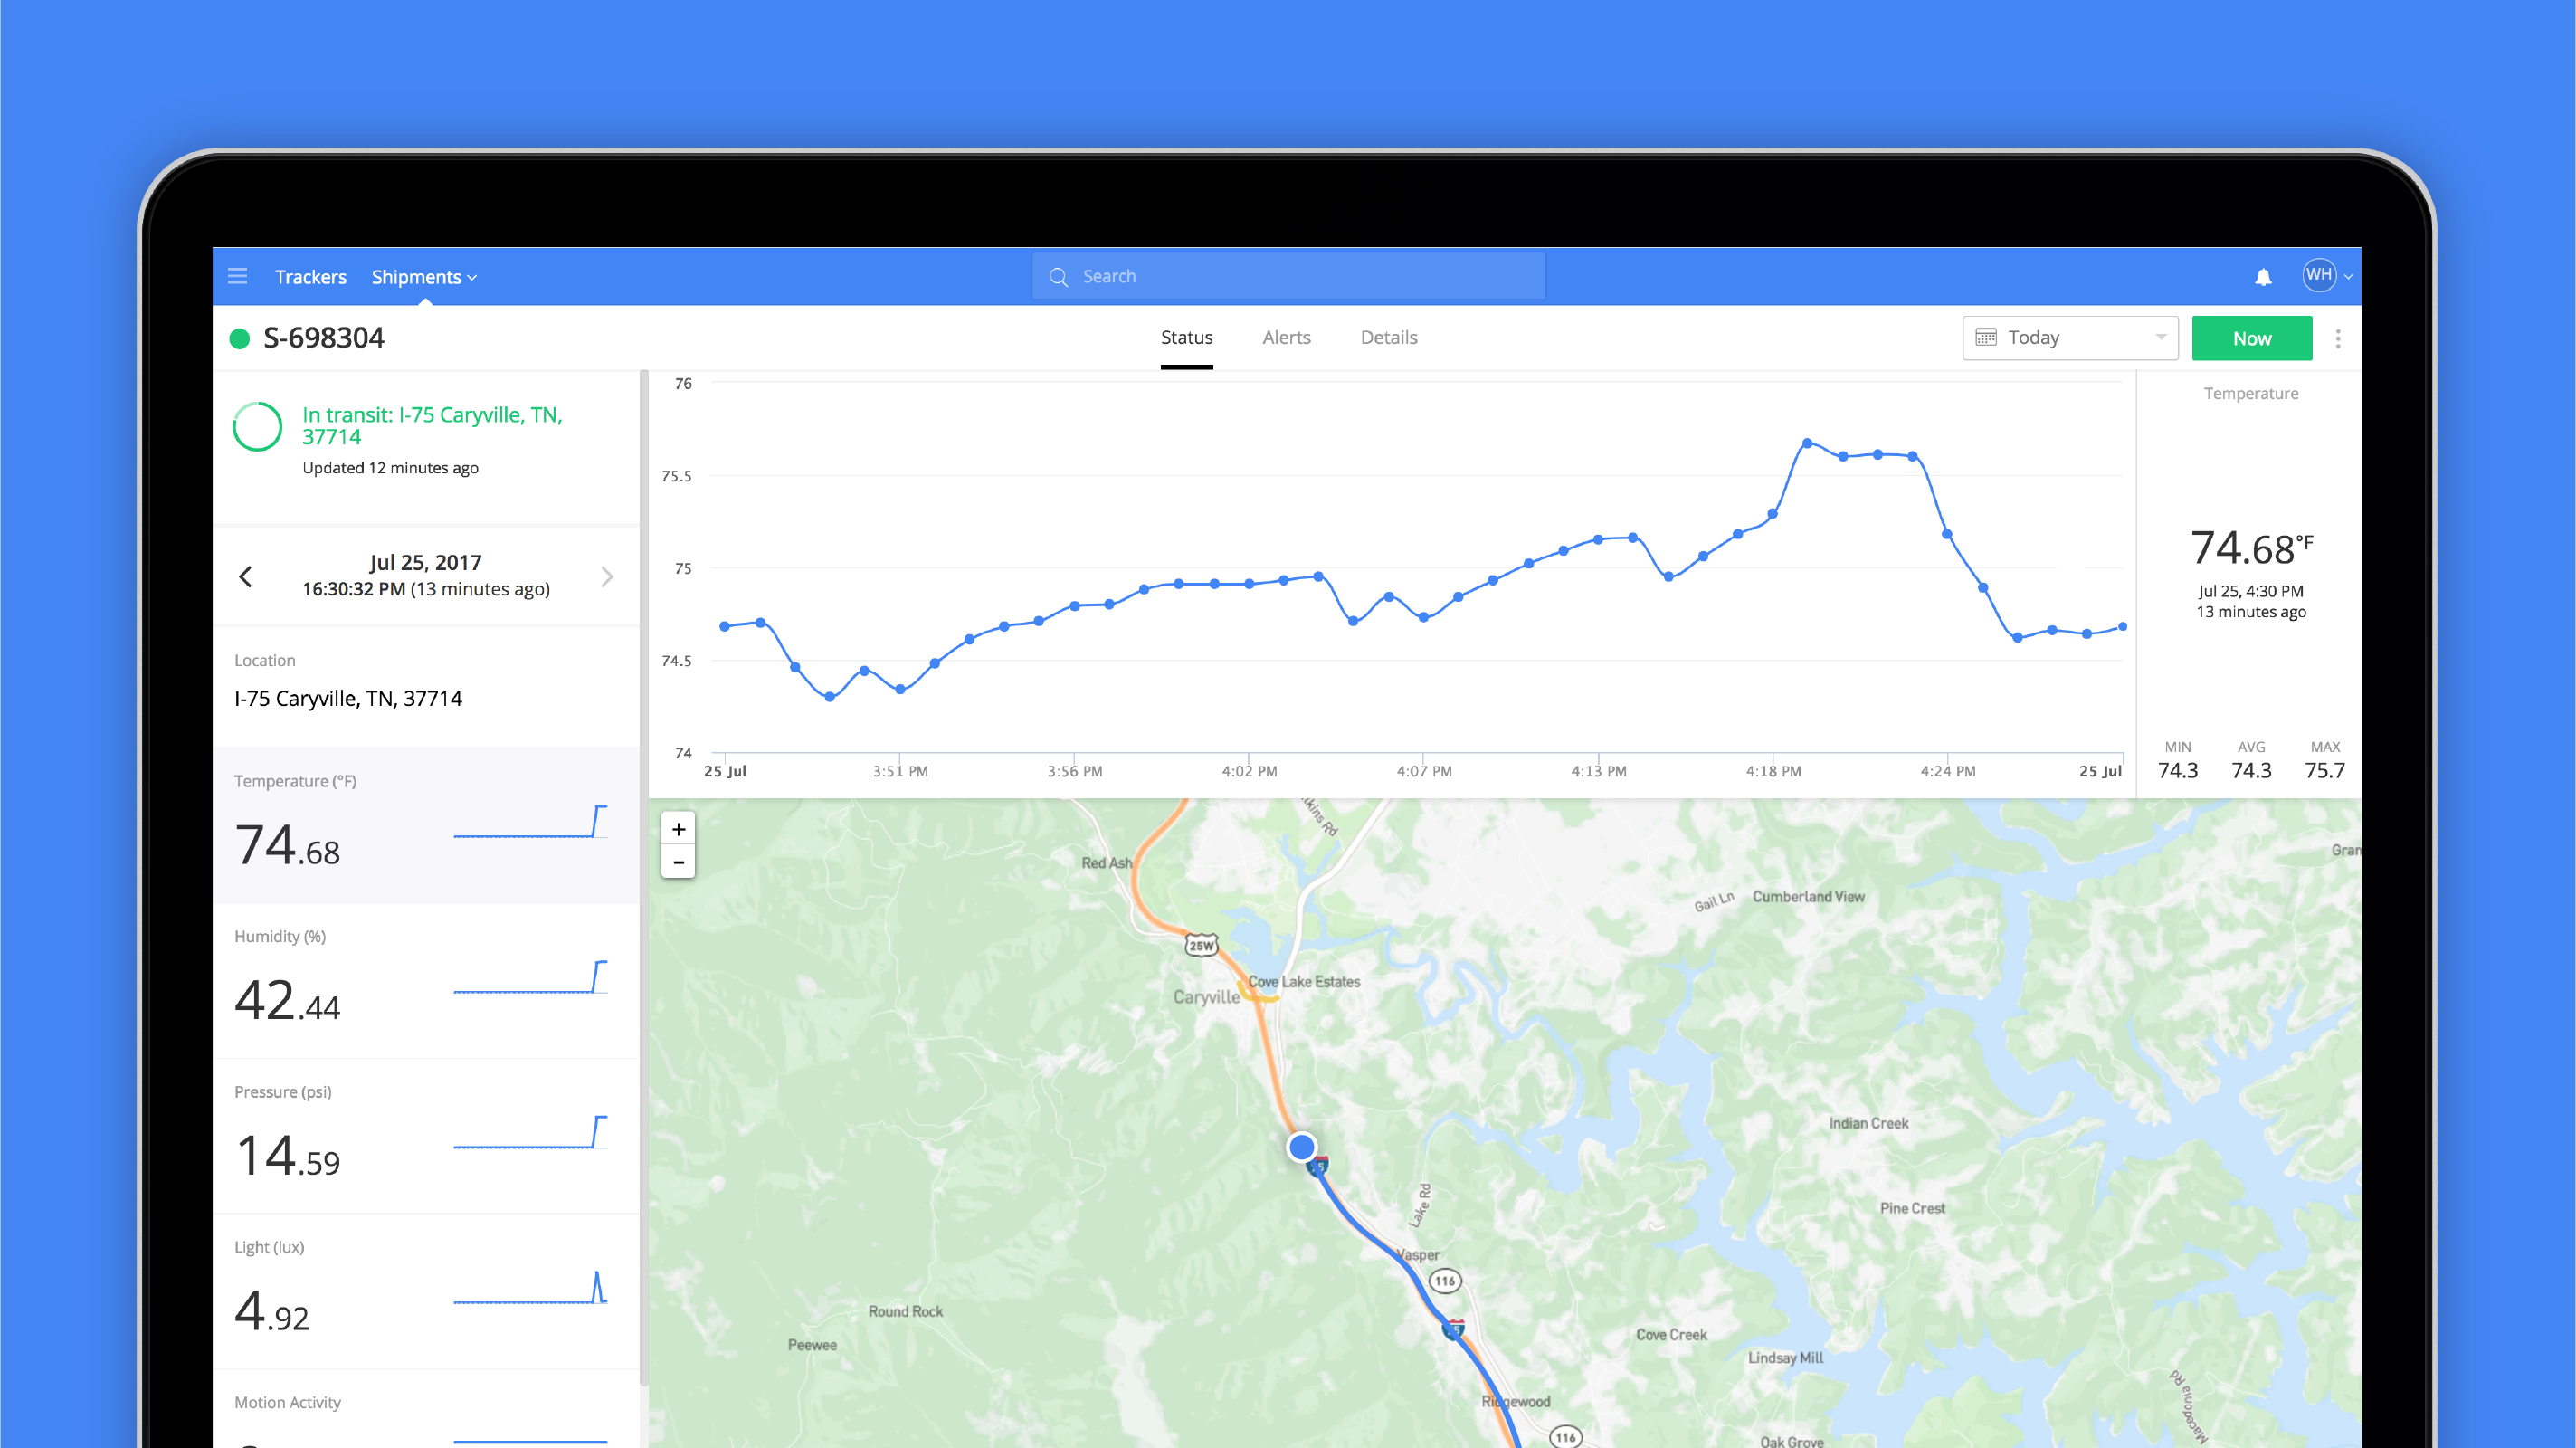
Step 3: Monitor Shipments In-Transit
Once a shipment is created and linked to a tracker, you can access it in the Active Shipments interface, either on a map or in a list. Just click a shipment to view its current status, location, any alerts that have been triggered, and other useful information.
As soon as a shipment arrives at its destination, just remove the tracker and complete the shipment. The shipment will then be available in the Completed Shipments list, where it’s easy to reference at any time.
It’s About The Shipment, Not The Tracker
The Tive tracker and software platform is a tool to help you optimize your supply chain, and it’s designed to integrate seamlessly with your existing shipment systems to make you as aware and efficient as possible. That’s why we designed our workflow to center around shipments, not trackers. This new shipment-oriented interface also acts as the basis for a number of upcoming features that will make it even easier to gain deep insight into your supply chain - stay tuned for those. But in the meantime, we think you’ll enjoy the benefits of a “shipment first” approach:
Increase your efficiency by spending less time configuring alerts and tracking down in-transit shipments.
Improve coordination between managers and shippers with consistent, up-to-date upcoming shipments and a streamlined tracker deployment process.
Enjoy better customer service with live shipment updates and notifications if something goes wrong.
Let us know what you think!